Fancy GitHub Actions with Problem Matchers
GitHub Actions is the CI/CD platform for GitHub. It’s a powerful tool that makes it easy to run CI/CD pipelines on GitHub.
For (aspiring) authors of Actions, there is a little known tool that can help you propel your Action from one that shows some output in the logs to one that directly annotates problems in your code making it visible in pull requests.
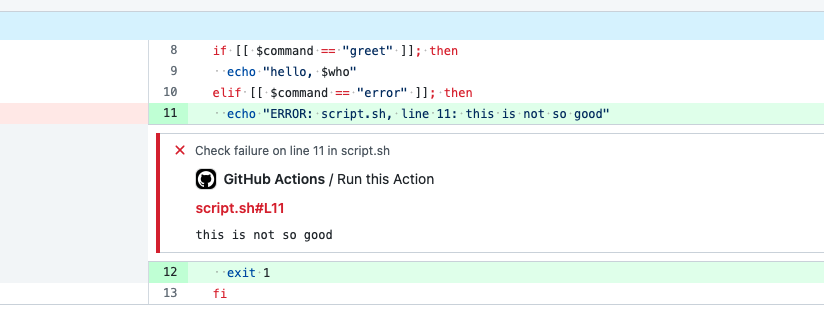
I’m talking about Problem Matchers and the annotations they can create:
What is a Problem Matcher?
A Problem Matcher is a small piece of configuration that tells GitHub Actions what lines of your logs correspond to what lines of your code.
Imagine a tool that creates error messages like the following:
> json-validator myconfig.json
WARN: myconfig.json:1:9: Missing attribute 'age'
ERROR: myconfig.json:1:4: Unexpected token '}'
These logs contain all information necessary in order to create annotations as shown above:
- each line starts with the severity of the message
- it then specifies the filename and location where the problem occurred
- and the last part of the line is the actual problem
A Problem Matcher tells GitHub exactly this: how bad is the problem (severity), where did it occur (filename and line number), and what is the problem itself (message).
How can I create a Problem Matcher?
Let’s say you want to create a Problem Matcher for the hypothetical json-validator above.
There are two steps you need to follow in order to create and use such a Problem Matcher.
Step 1: Define the Problem Matcher
A Problem Matcher is defined in a JSON file and consists of an owner and a pattern that defines how to scan the logs and extract the relevant information.
The following is an example Problem Matcher for the json-validator.
{
  "problemMatcher": [
    {
      "owner": "json-validator",
      "pattern": [
        {
          "regexp": "^(ERROR|WARN|INFO):\\s(.+):(\\d+):(\\d+):\\s(.+)$",
          "severity": 1,
          "file": 2,
          "line": 3,
          "column": 4,
          "message": 5
        }
      ]
    }
  ]
}
I have given it a name, json-validtor and defined the regular expression in the regexp field.
This regex says:
- log lines start with
ERROR,WARNorINFO - after a colon and a space , there is a filename
- after another colon, there is a line number
- after another colon, there is a column number
- after another colon, there is a message
With the attributes below the regexp attribute, we’re defining which match group (these are the patterns in brackets) of the regular expression map to which attribute.
For example, by defining severity: 1, we’re telling the regex that the first match group is the severity.
And that’s it! All we now need to do is install the Problem Matcher.
Step 2: Install the Problem Matcher
With the JSON file from the first step stored as matcher.json, we can go ahead and install the matcher either in a workflow or as part of an Action.
This can be done with the command add-matcher, like so:
steps:
  - run: echo "::add-matcher::matcher.json"
  - run: json-validator myconfig.json
  - run: echo "::remove-matcher owner=json-validator::"
With these steps, we’re first installing the Problem Matcher, then running the Action, and eventually removing the Problem Matcher again.
Note that a Problem Matcher is removed by specifying the owner of the matcher. Removing it makes sure the Problem Matcher is not applied to unrelated Actions that emit similar log files.
Conclusion
Hopefully this article gives you a good overview of how Problem Matchers work and how to use them.
If you want to see them used in practice, checkout out the setup-node action.
If you’re looking for something to play around with, or if you want a head start for a simple action that uses Problem Matchers, you might want to take a look at my bash-action.